Your knees may drift apart as your hips lift. You may also feel pressure in your lower back or neck if you lift higher than is comfortable. To practise Bridge Pose with less strain, focus on steady foot placement, controlled hip lifting, and a comfortable neck position rather than trying to reach maximum height. A block between the thighs may help some practitioners notice their leg alignment, but it should not be squeezed forcefully. If the pose causes pain, lower your hips and adjust or stop.
As an illustration, picture a desk worker whose knees fall wide in bridge and whose lower back tightens, so they push the hips higher. A block between the thighs and a lower lift moves the effort from the lower back to the backs of the hips.
Bridge Pose knee alignment: why the knees fall apart and the spine pays for it
Knees splay in Bridge Pose because the inner-thigh muscles and the deep hip muscles are not sharing the load. When your thighs turn outward, your thigh bones no longer line up over your feet. Your main buttock muscle can’t lift your hips well, so your hamstrings and lower back muscles do the lifting instead. The lower back then arches to finish the height the hips could not produce.
Healthy knee tracking keeps each knee over the second toe, about hip-width apart, with the shins close to vertical at the top. The knee is a hinge with little tolerance for twisting under load, so a knee that wanders off that line is being rotated by body weight. The pelvis follows the knees. Wide, turned-out feet tip your pelvis forward. This squeezes the small joints at the back of your lower spine.
A dull ache at the front of the knee usually points to feet set too close, which pushes the knees past the toes. Root the whole foot, with the big toe mound, little toe mound and heel all pressing down, before squeezing the block.
Pressing the inner knees toward each other wakes the adductor magnus, a large inner-thigh muscle that also helps lift the hips. That is why a block between the thighs changes the pose within a breath.
Where neck pain in Bridge Pose comes from
Neck pain appears when body weight rests on the back of the neck instead of on the shoulders and upper arms. Keep the gaze fixed on the ceiling, keep the back of the neck long, and do not turn the head once the hips are lifted. In this pose your neck is bent forward. In that position, its discs and ligaments cope poorly with weight and almost not at all with turning. Turning your head adds a twist to the bend.
Height is a second cause. Pushing the hips up until the chin presses into the sternum shortens and compresses the neck, so lower the hips until the chin floats clear. Tight shoulders limit how far the shoulder blades roll under, which pushes more load toward the neck.
Joint preparation: ankles, hips and shoulders before you lift
Three joints need attention before Bridge Pose loads them: the ankles, the hips and the shoulders. Each drill below is slow and small.
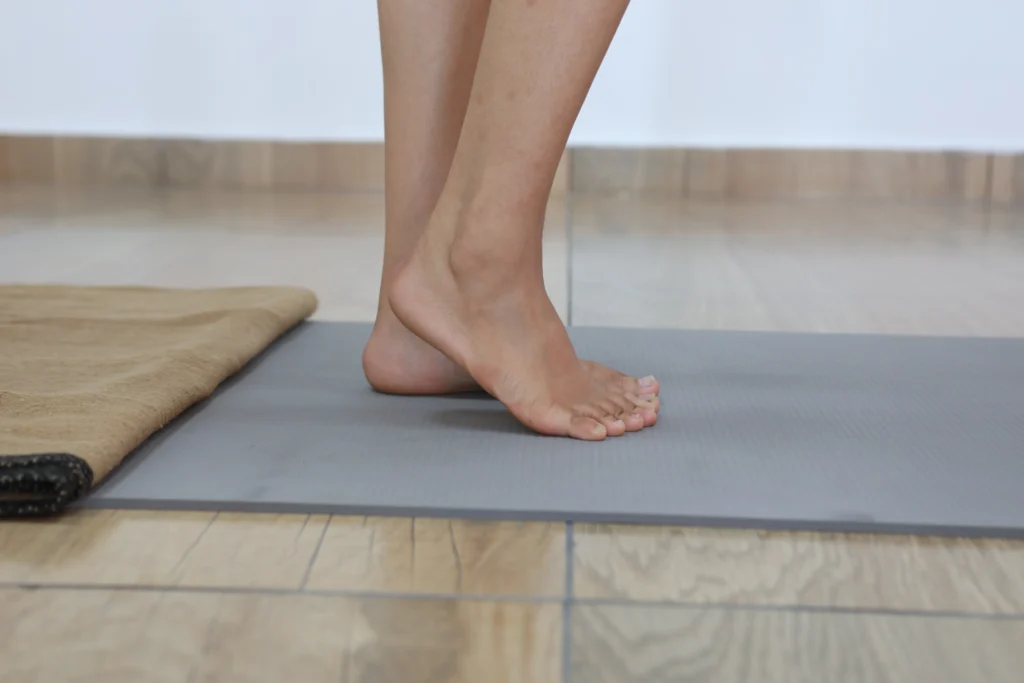
- Ankle and foot activation: Lie on your back with knees bent. Spread the toes, lift them, then press the ball of the big toe and the heel down together. Repeat 8 times.
- Block squeeze for the inner-thigh muscles: Place a block between the thighs and press inward for 5 seconds, then release. Repeat 10 times, keeping the lower back resting evenly on the mat.
- Shoulder roll with arms overhead: Reach the arms past the head, then draw the shoulder blades down and toward the spine. Do 8 slow rounds.
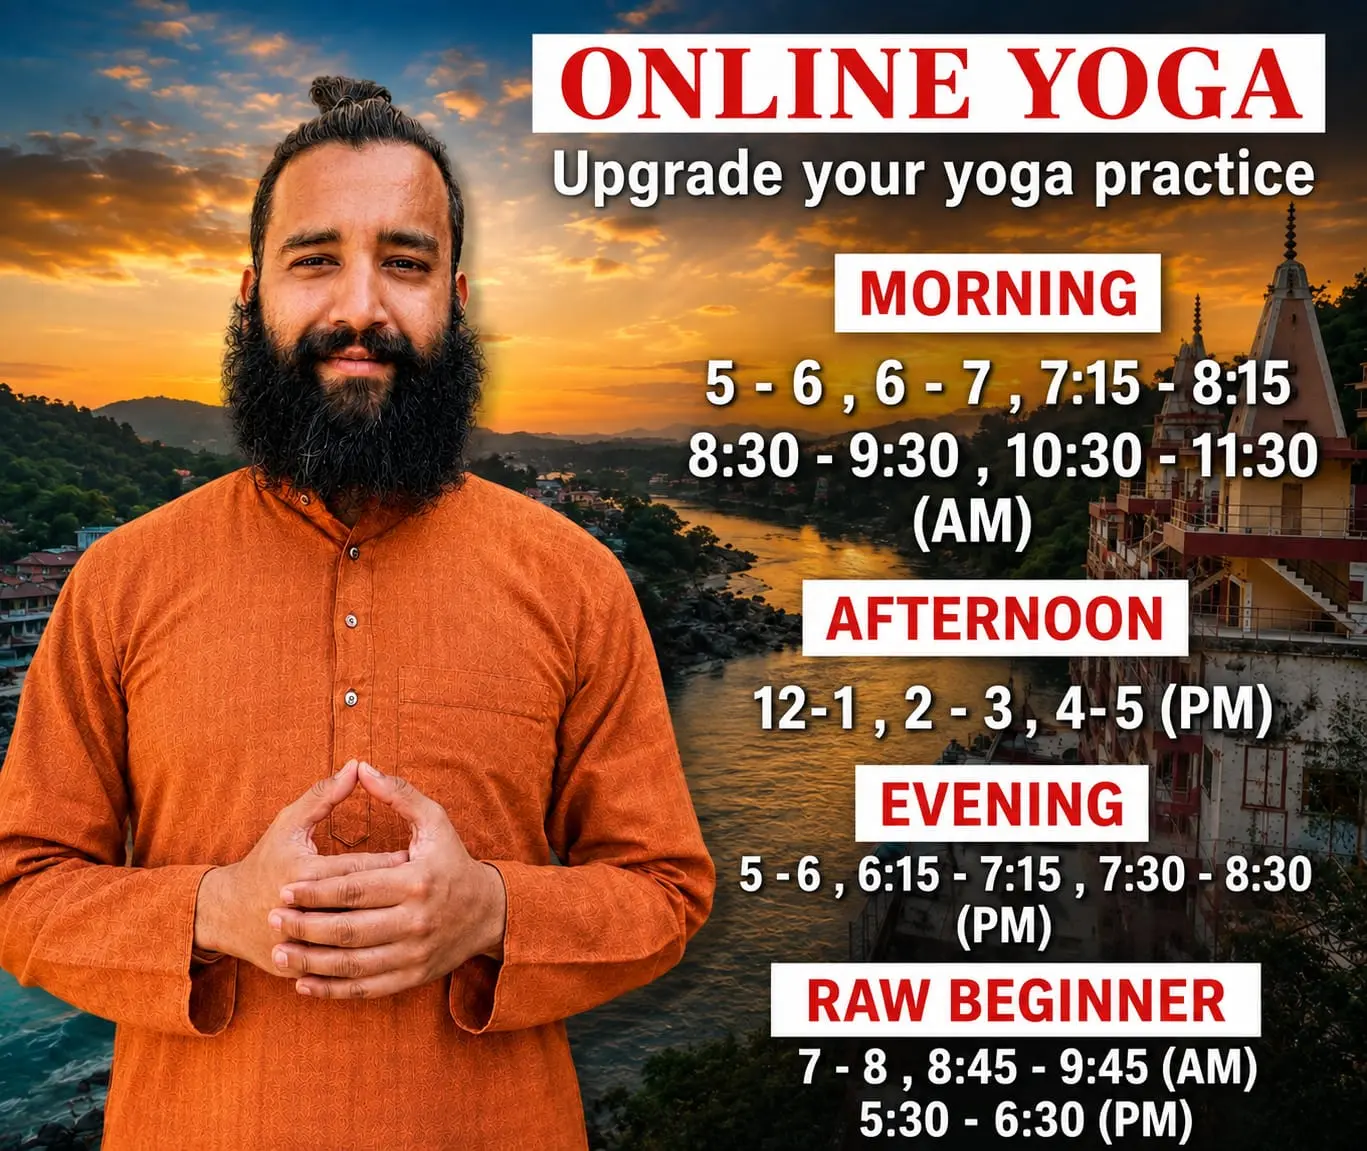
Home practitioners who want a teacher to watch these drills can use Ganga Yogshala’s online yoga classes, which follow the same prop-based preparation.
How to do Setu Bandhasana with blocks: three setups and exact bone placements
A block works as an anatomical bridge. It gives the muscles a reference point they cannot find alone, so the body learns the correct pattern instead of leaning on the spine. Each setup below corrects one fault.
Block between the inner thighs
Place a block just above the knees, on the lower third of the thighs and never on the kneecaps. Keep the feet parallel with the heels directly under the knees. Squeeze the block with the inner thighs and rotate the thighs slightly inward, so the knees stay in line with the second toes. This setup addresses splaying knees and switches on the inner-thigh muscles and glutes.
Hands interlaced beneath the sacrum with rolled shoulders
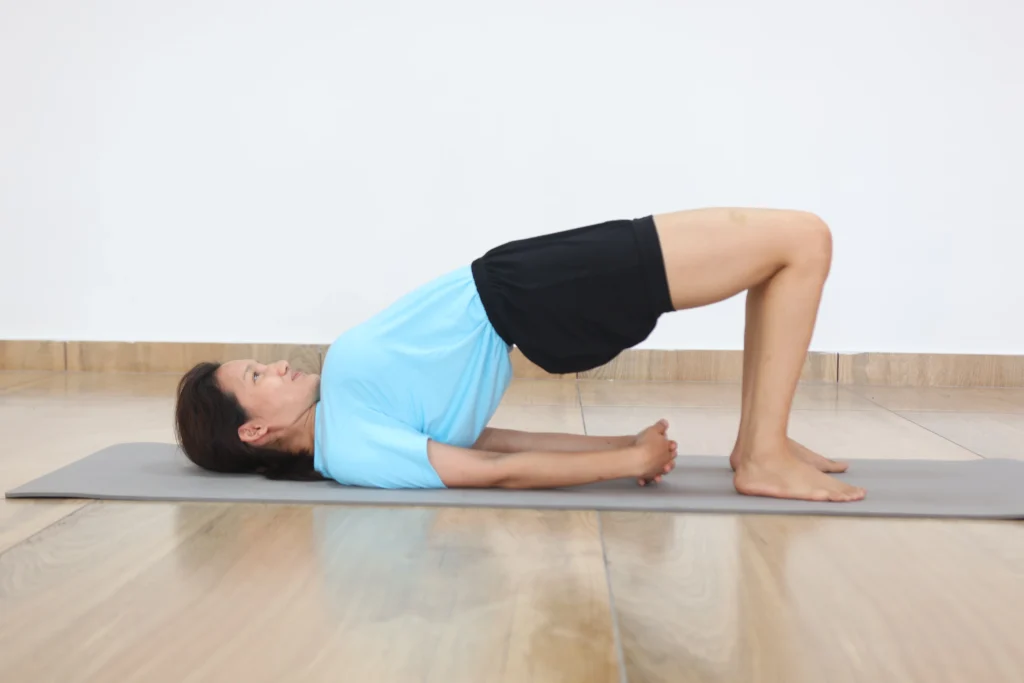
Roll one shoulder under at a time, so the outer upper arms and the inner edges of the shoulder blades press into the mat. Clasp the hands beneath the pelvis and press the forearms down. The shoulder blades move toward each other, the chest lifts toward the chin, and the neck stays off the floor. This setup addresses neck loading and gives the upper back something to extend against.
Block under the sacrum
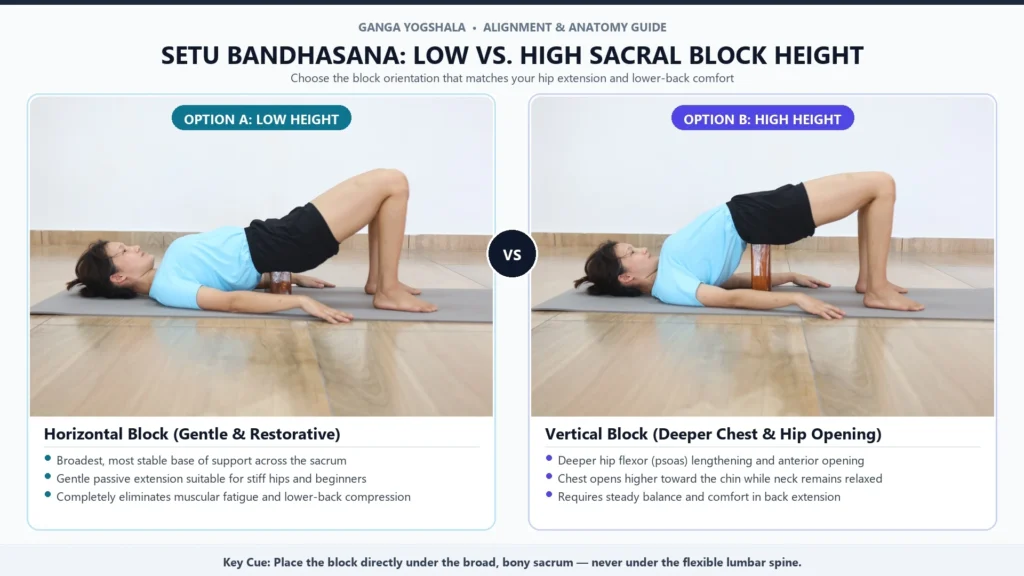
Use the lowest height and the widest face first. The flat, bony back of the sacrum (the triangle-shaped bone at the base of your spine) rests on the block. Keep the upper edge at the top of the sacrum, clear of the curve of your lower back. The legs stay active, with the block between the thighs if a second block is available. Because the pelvis is supported, your lower back does not need to arch to find height, which makes this the gentlest option for a sensitive lower back.
Choose the first setup by symptom. Start with the thigh block if the knees splay, the sacrum block if the lower back complains, and the rolled-shoulder clasp if the neck feels loaded. Once one setup feels steady across several sessions, combine the thigh block with the rolled-shoulder clasp. The pairing keeps the inner-thigh muscles and glutes working while the shoulders carry the upper body, which spreads load more evenly along the whole chain.
Bridge Pose without lower-back pain: entering, holding and leaving the pose
Enter slowly, hold for 20 to 30 seconds, and repeat 3 to 5 rounds. Beginners can start with 15 seconds. Experienced practitioners can build toward one minute, provided the neck and lower back stay quiet throughout.
- Lie on your back with knees bent, feet hip-width apart and heels under the knees.
- Place the block between the thighs if you use one. Press the inner knees together.
- Exhale, press the feet down and tilt the pelvis so the tailbone lengthens toward the knees.
- Lift the hips one vertebra at a time, then roll the shoulders under and interlace the hands.
- Hold with the gaze on the ceiling and the breath moving into the ribs.
- To leave, release the hands, then lower the spine from the upper back down to the sacrum. Rest for three breaths between rounds, and let the knees fall together.
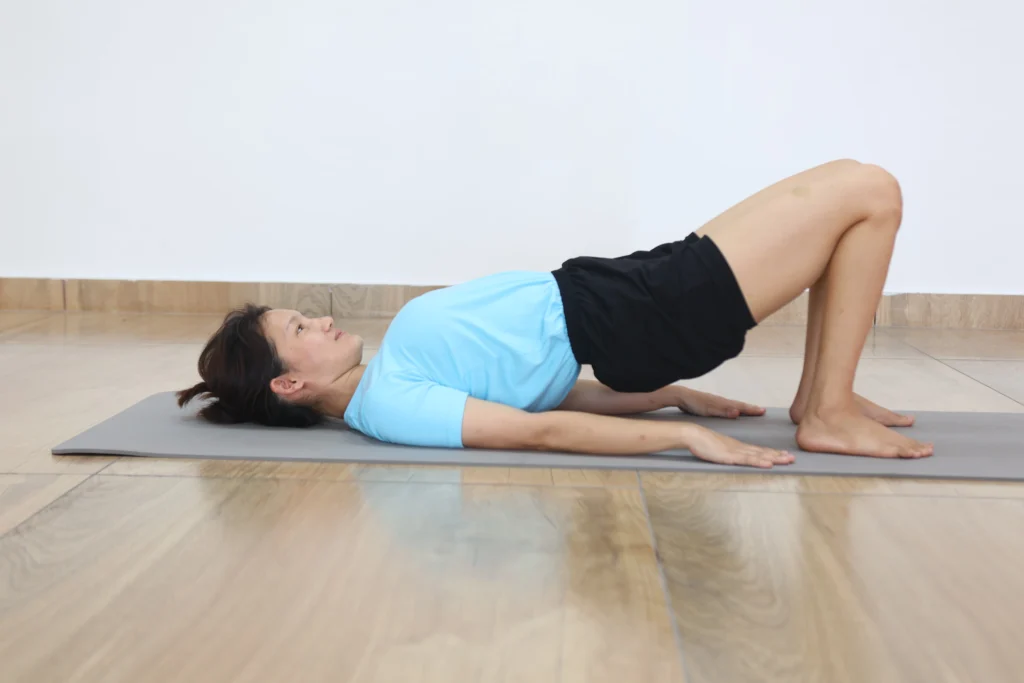
A dynamic version works too: lift and lower with the breath for 6 to 8 repetitions, pausing at the top for one inhale and exhale. Dynamic rounds suit a warm-up, while longer holds suit the end of a practice, when the glutes are already working.
Some people should skip or modify the pose. Anyone with a recent neck injury, a disc problem in the neck, an acute lower back flare or uncontrolled high blood pressure should get guidance from a physician or qualified teacher first. Late pregnancy calls for the same advice. The supported version with a block under the sacrum is the usual modification for tender backs.
Burning, trembling or sharp: telling effort from warning signals
A burning or trembling sensation in the glutes, hamstrings and inner thighs is muscular work and is acceptable. A sharp, pinching or electric sensation in the lower back, neck, knee joint line or hands is a signal to come down. Fatigue is broad and dull and fades within a few breaths of releasing. Joint or nerve irritation is narrow, sharp or tingling, and it may linger.
Muscles shake when they hold a hard position close to their limit. The muscle fibres get tired and take turns doing the work. Tingling in the fingers suggests a nerve is being compressed, often from shoulders pushed too far off the floor or a loaded neck. Lower the hips and rebuild the setup before trying again.
Yoga for desk hunch: what Bridge Pose can and cannot do
Bridge Pose can counter some effects of desk posture by extending the hips and opening the front of the chest, but only if the extension comes from the glutes and the upper back. Long sitting keeps the hip flexors short and the glutes quiet. Bridge asks for the reverse.
A forward head and rounded upper back limit how far the shoulders roll under, so hunch and neck strain in this pose often appear together. Fewer inches of lift and a harder squeeze on the block give the upper back gentle extension without crushing the neck.
Common online advice says to lift as high as possible. Height gained by arching the lower back is height the glutes did not produce, so a lower lift with active thighs is the better target for most people.
Two errors behind most Bridge Pose pain, and one cue worth trying
Two errors cause much of the pain in Bridge Pose: lifting by arching, and setting the feet at the wrong distance.
Arching shows as flared lower ribs and a pelvis that rises past the line of the chest. Lower the hips until the front ribs soften toward the pelvis.
Foot distance affects how the pose feels, but there is no single position that suits everyone. Start with feet about hip-width apart and adjust them slightly until you can lift without knee or back discomfort. Fingertip-to-heel distance is only a rough guide, not a rule.
One cue worth trying: press the heels down as if sliding the mat toward your feet. The effort travels through the backs of the legs into the hips.
A five-point alignment check to read beside the mat
Run through these five points at the top of the pose and adjust one at a time.
- Knees: Each knee points over the second toe, with the block held firmly between the thighs.
- Pelvis: The tailbone lengthens toward the knees, and the front of the hips rises without the ribs flaring.
- Lower back: The sensation is even and quiet, with no pinching at any single segment.
- Shoulders: The shoulder blades roll under and press toward each other, with weight on the outer upper arms.
- Neck: The gaze stays on the ceiling, the head does not turn, and the chin floats clear of the sternum.
Questions people ask about Bridge Pose
How long should I hold Bridge Pose? Hold for 20 to 30 seconds per round and do 3 to 5 rounds. Beginners can start with 15 seconds, and any hold should end as soon as the neck or lower back complains.
Is Bridge Pose bad for the neck? Many people can practise a comfortable version, but it may not suit everyone. Keep your head still, avoid pressing into the neck, and lower the hips if you feel discomfort. Seek professional guidance if you have a neck condition or ongoing symptoms.
Why do my knees hurt in Bridge Pose? Knee pain usually comes from feet set too close, knees falling wide or inward, or thighs that are doing no work. Set the feet so the fingertips brush the heels, point the knees over the second toes and squeeze a block. Sharp pain at the joint line is a reason to stop.
Can I do Bridge Pose every day? Short daily rounds suit many people when no pain follows. Keep the lift low and watch for neck stiffness the next morning, and anyone with a neck or disc condition should ask a physician first.
Why alignment is hard to judge from a screen or a mirror
Joint alignment in Bridge Pose is hard to self-assess because the errors that matter, such as knee tracking, pelvic tilt and neck position, show best from the side and from above. A front-facing screen or mirror rarely captures those angles. A practitioner also feels their own position through habit, so a splayed knee or tucked chin can feel neutral for years.
Outside feedback closes that gap. Self-checking Bridge Pose without lower back pain works better when someone else can see the pose and speak up about it. Ganga Yogshala’s live, two-way online yoga classes put teachers on camera with students, offering verbal and postural adjustments in real time